Mobile App
Implementation
As an example for a front-end interface, we decided to create a mobile app to demonstrate the API. The app is programmed in Expo, which is based on React Native. The app just sends HTTP requests while the seperate server does all of the heavy lifting. This modularity is beneficial for future projects.
Usage
The current design of the app is tailored to fit a proof-of-concept demonstration. When the app is first opened, the user is greeted with permission request to access the camera. After scanning a QR code, the user is brought to a controller screen. The user can directly control the movement of the robot with the buttons shown. At the bottom of the app, there is also a motions tab and a motor tab. The motions tab lets the user select and play a programmed motion for the robot, and the motor tab lets the user manually select and control the motors on the robot.
Home Screen
Functionality
- Connects to Api via local network on port 50000
- User scans a barcode using their device which will automatically connect them to the API if scanned successfully
Remote Screen
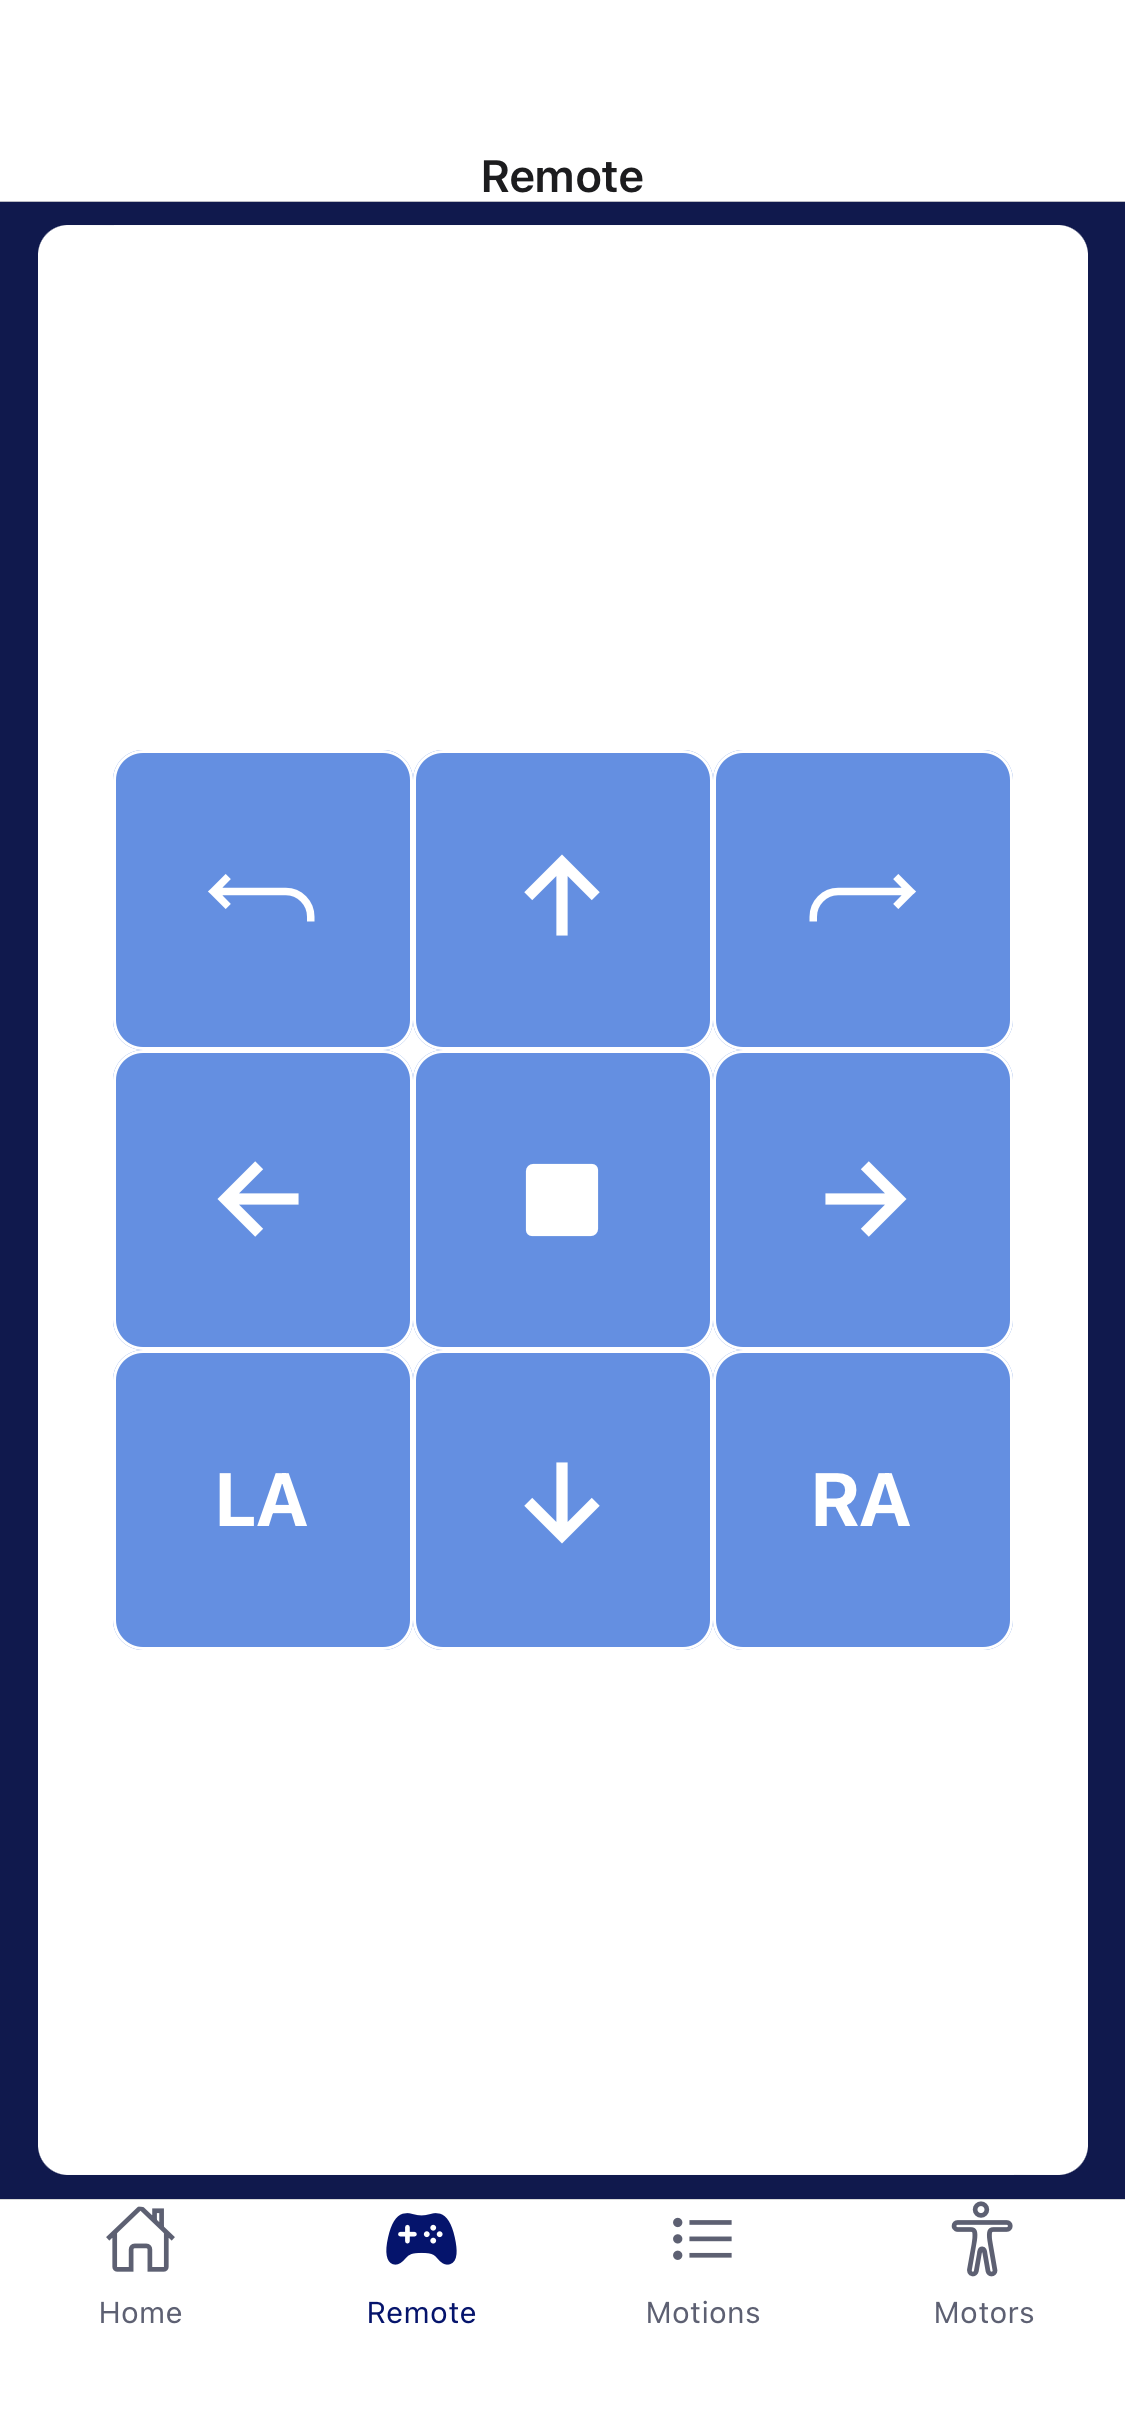
Functionality
- Set of buttons that allow the user to control the robot off their device
- When a button is pressed, a motion is called using a fetch request to the API which sends in the motionID of the button pressed. Each button has a specific motionID
Design/Development
- The controller buttons are laid out as items in a flatlist using a list of objects called ‘buttons’ as data
- Mimics the buttons on the physical controller
- Each button contains 6 properties: id, button, motion, motionID, icon, iconType
- Each button item in the flatlist is rendered as a stylized TouchableOpacity component
- Each button component calls a method called buttonPress on press which passes in that button’s specific motionID as a parameter
- buttonPress method calls API and passes in the motionID
Motion Screen
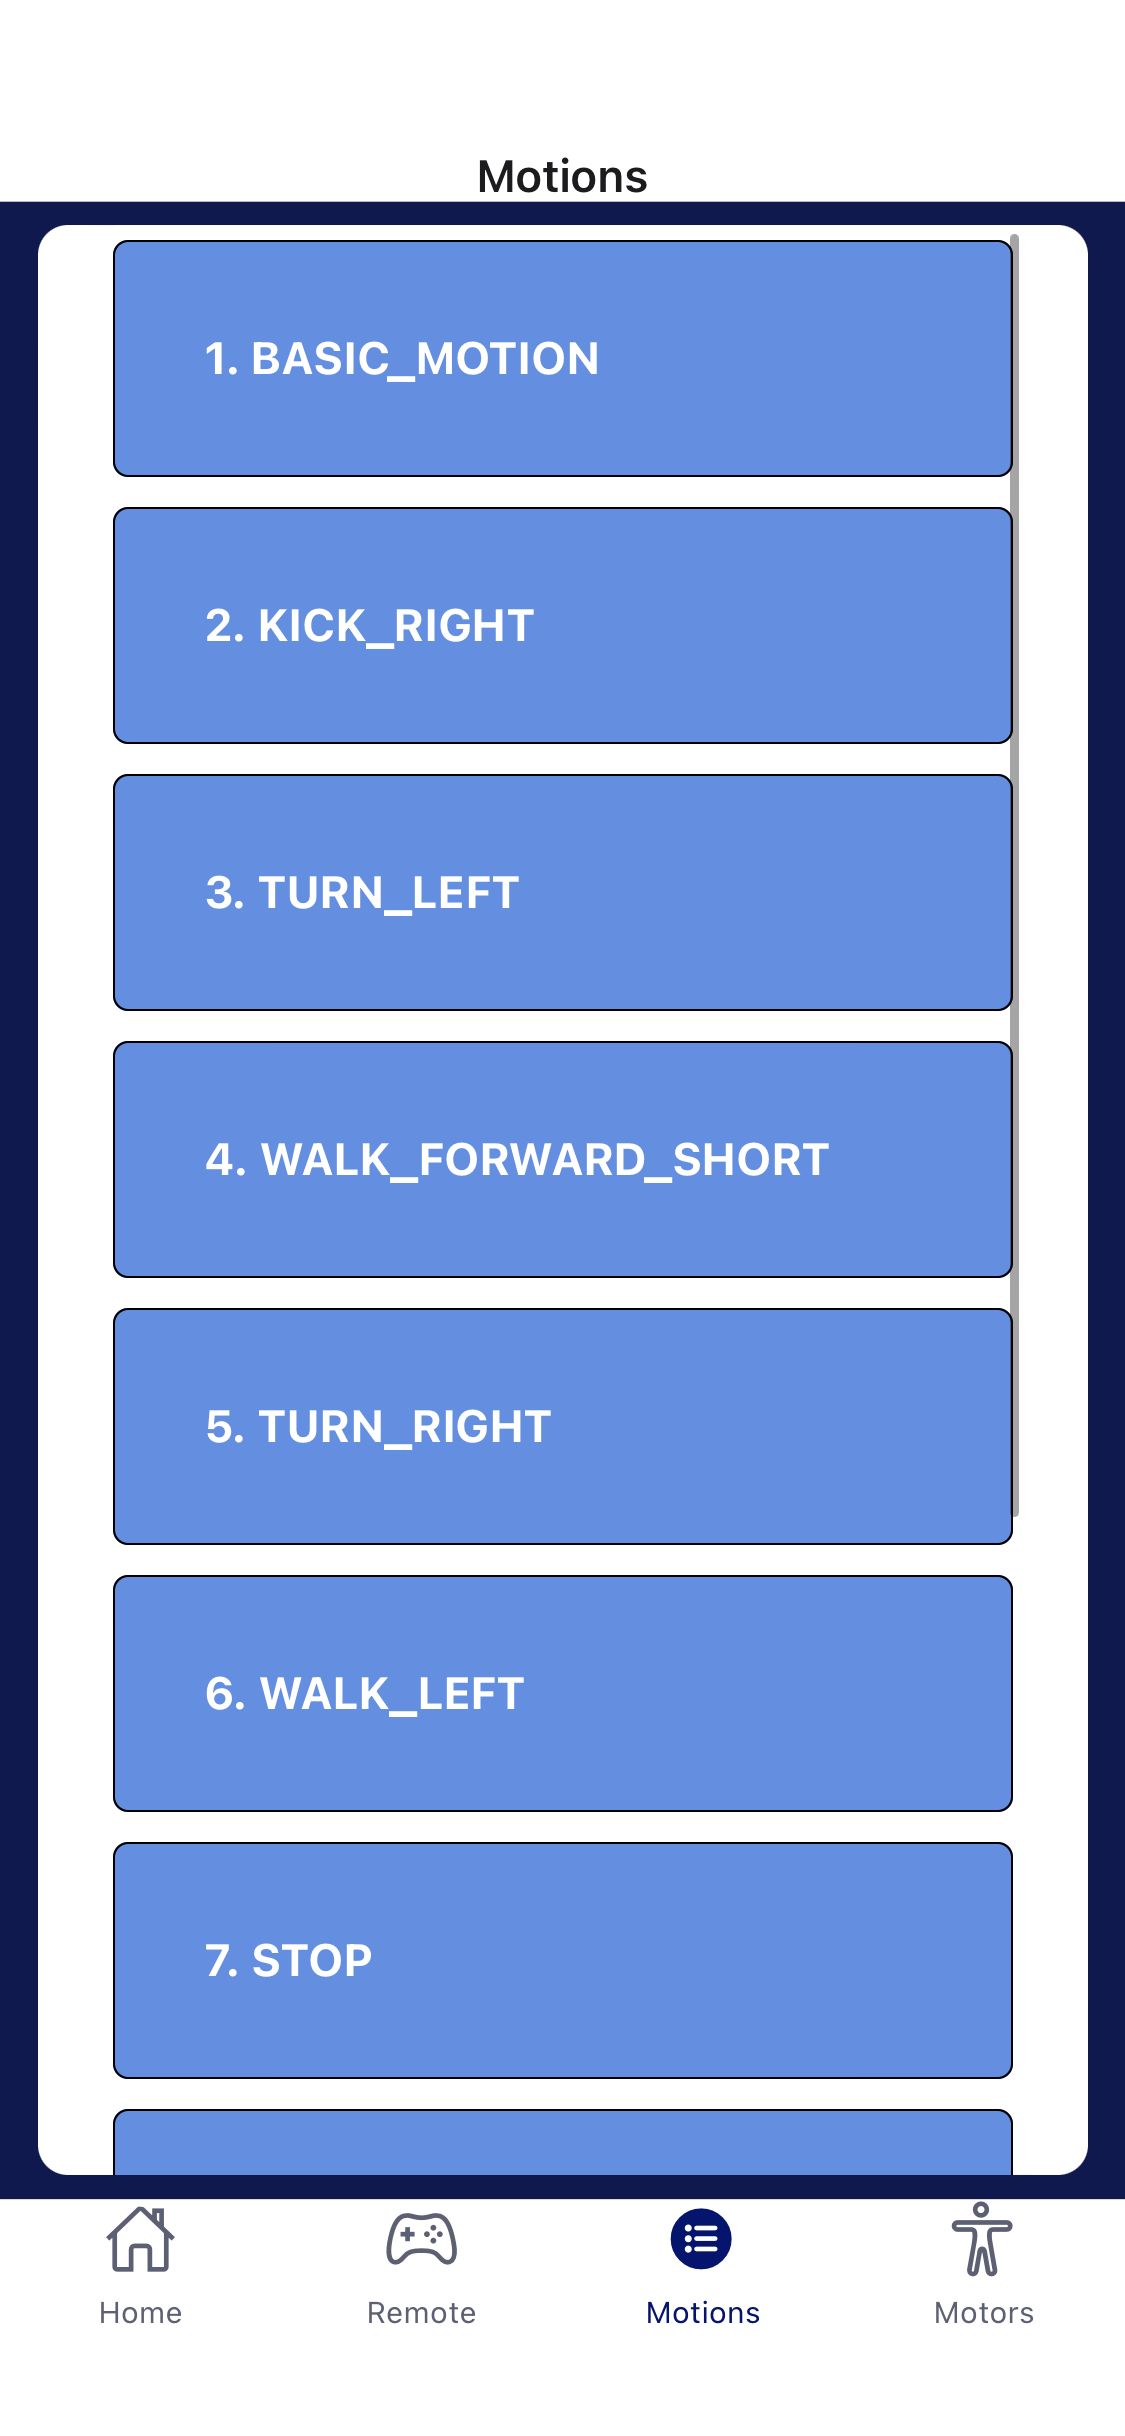
Functionality
- List of available motions that a user can select from
- These available motions are requested from the API which allows for the future teams to build their own motions using the motion builder and be able to use them in the app
Design/Development
- The motion buttons are laid out as items in a scrollable flatlist using a list of objects called ‘motions’ as data
- Each motion object contains 4 properties: id, button, motion, motionID
- Each motion item in the flatlist is rendered as a stylized TouchableOpacity component
Motor Screen
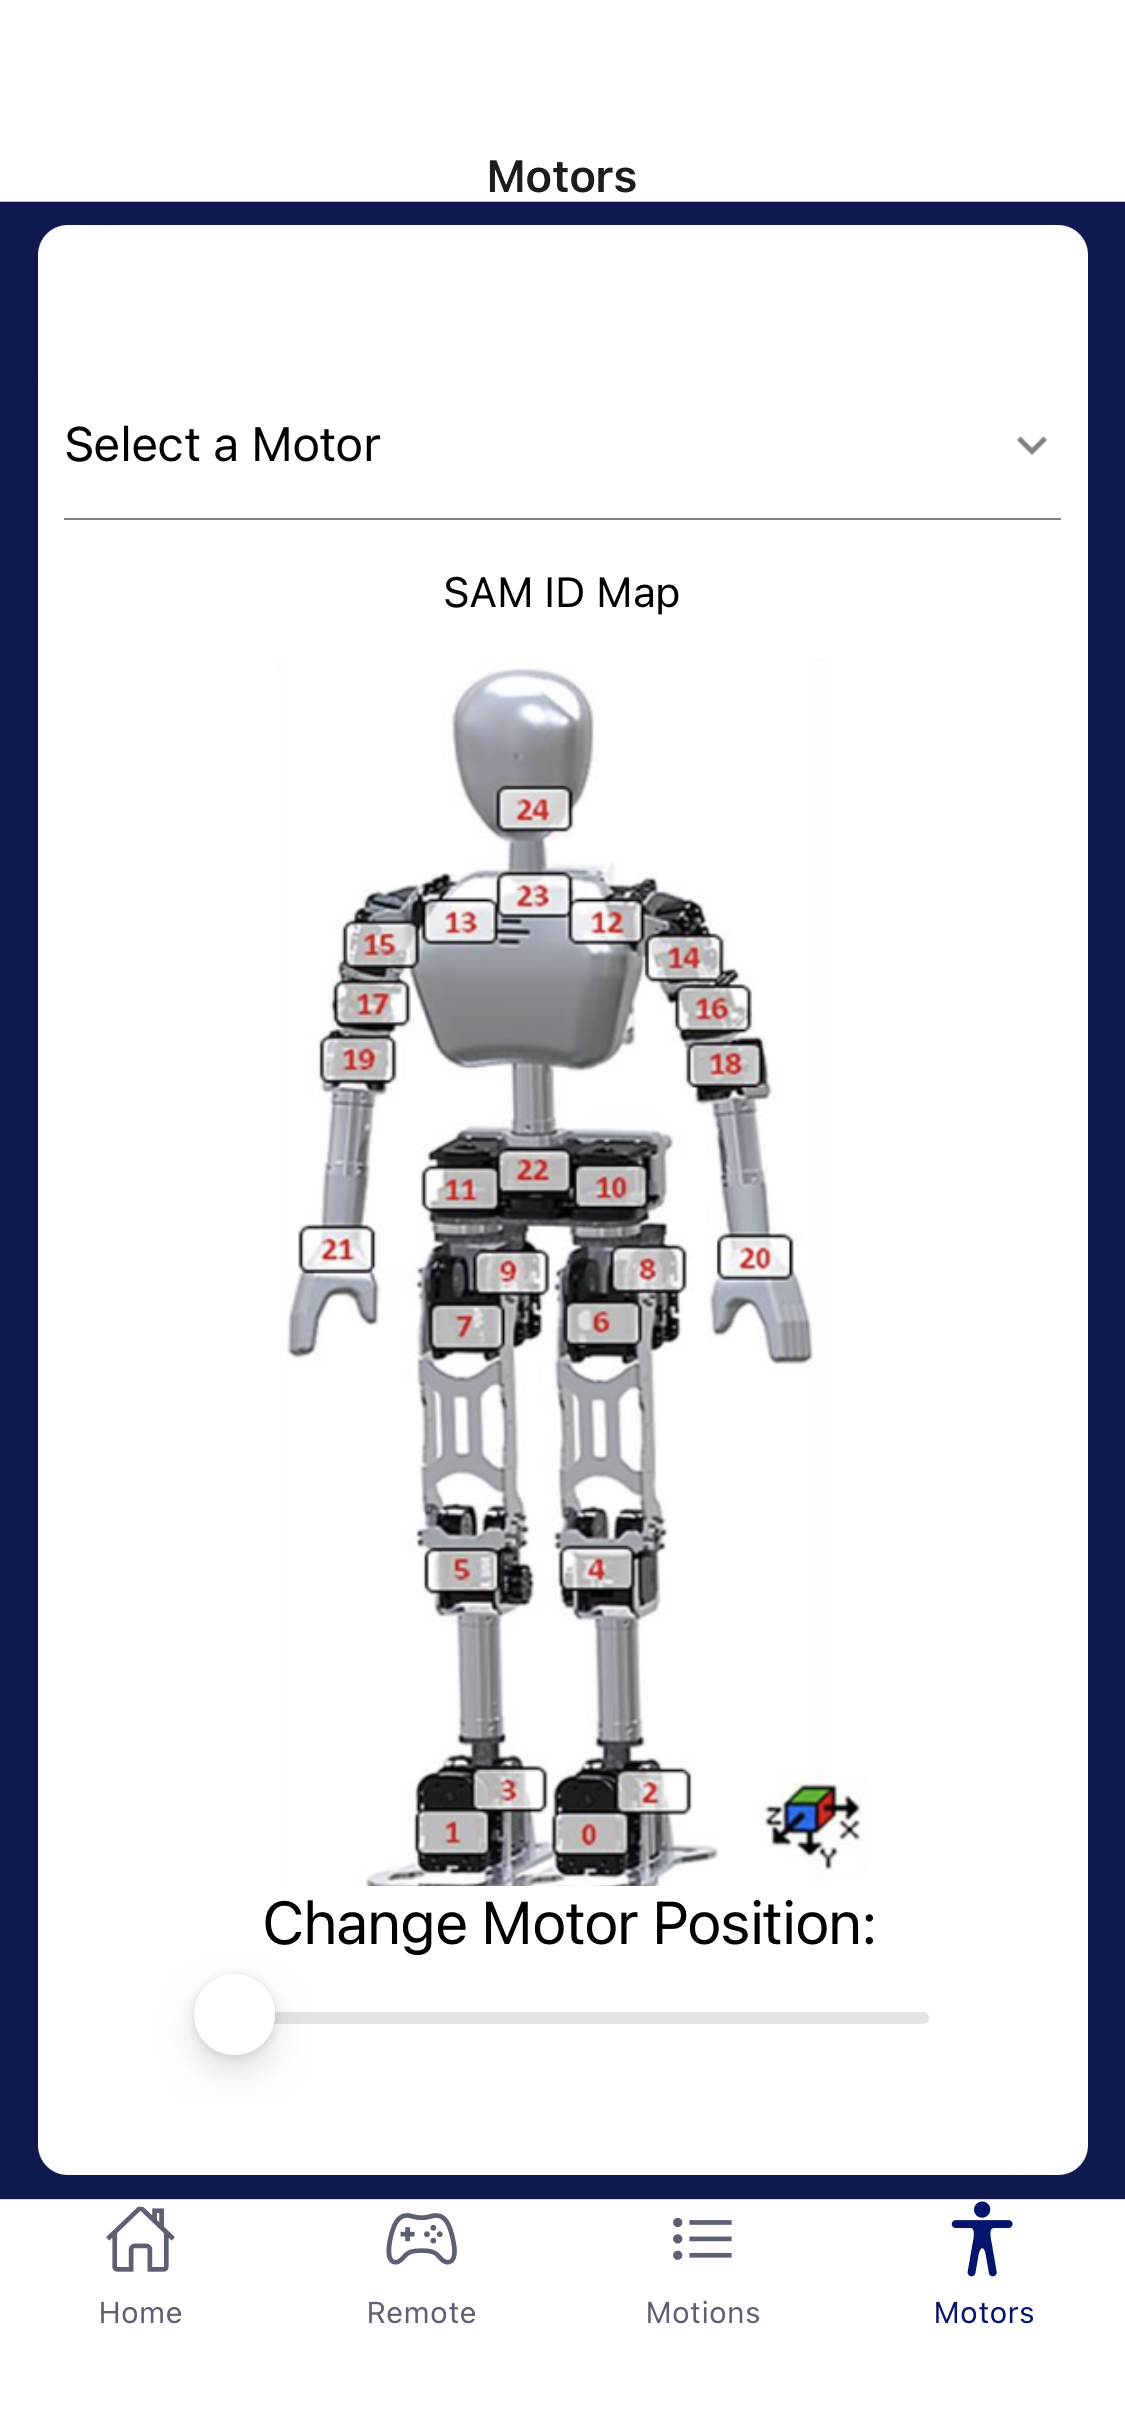
Functionality
- Allows the user to select a specific motor on the robot to control
- Once motor is selected, a slider is used to manipulate the position of the motor
Design/Development
- There is a list called ‘motors’ which contains each motor object
- The motors are laid out in a Dropdown component which will allow the user to select a motor
- The Slider component uses the respective motors position as the value that can be manipulated